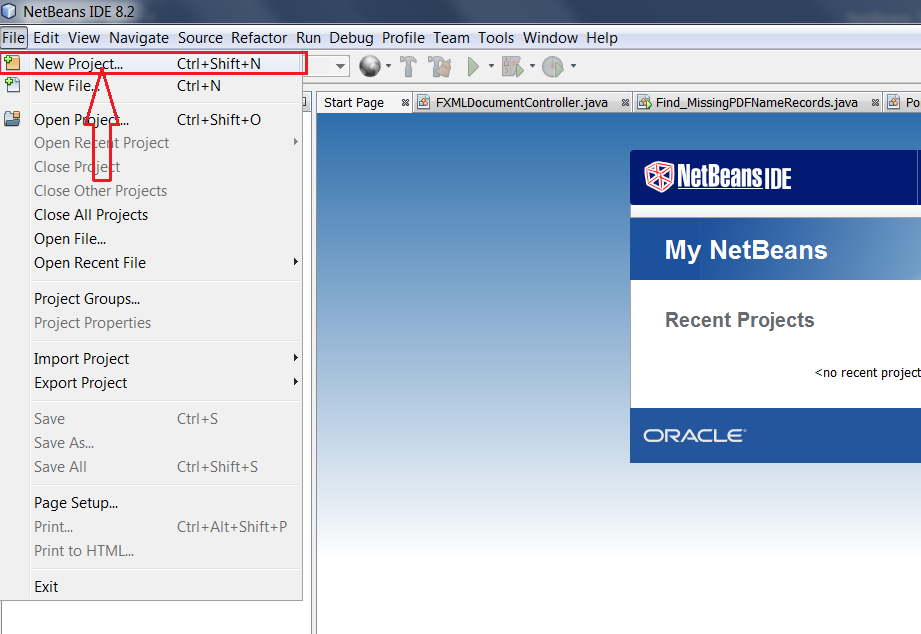
i) Click on File menu >> New Project.
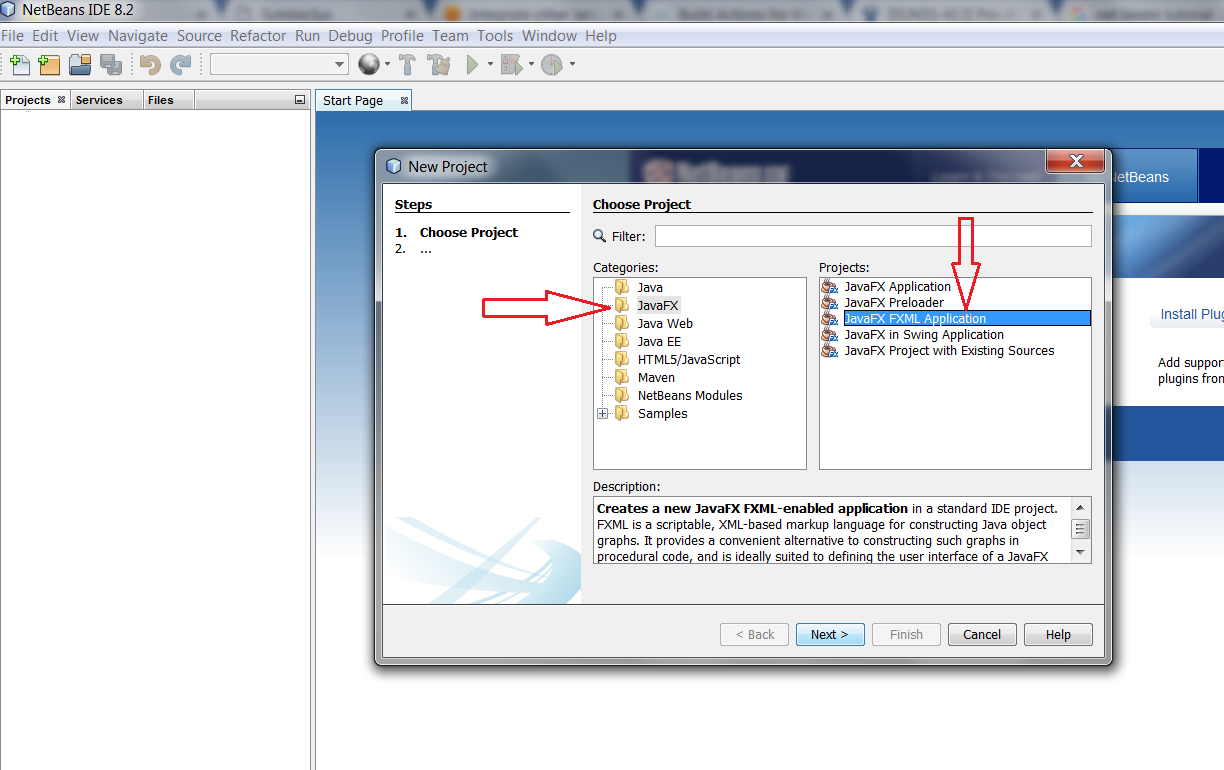
ii) New project window will appear. Here you have to select JavaFX in categories and select “JavaFX FXML Application” in Projects list and then click “Next” Button. Please Follow the below screenshot.
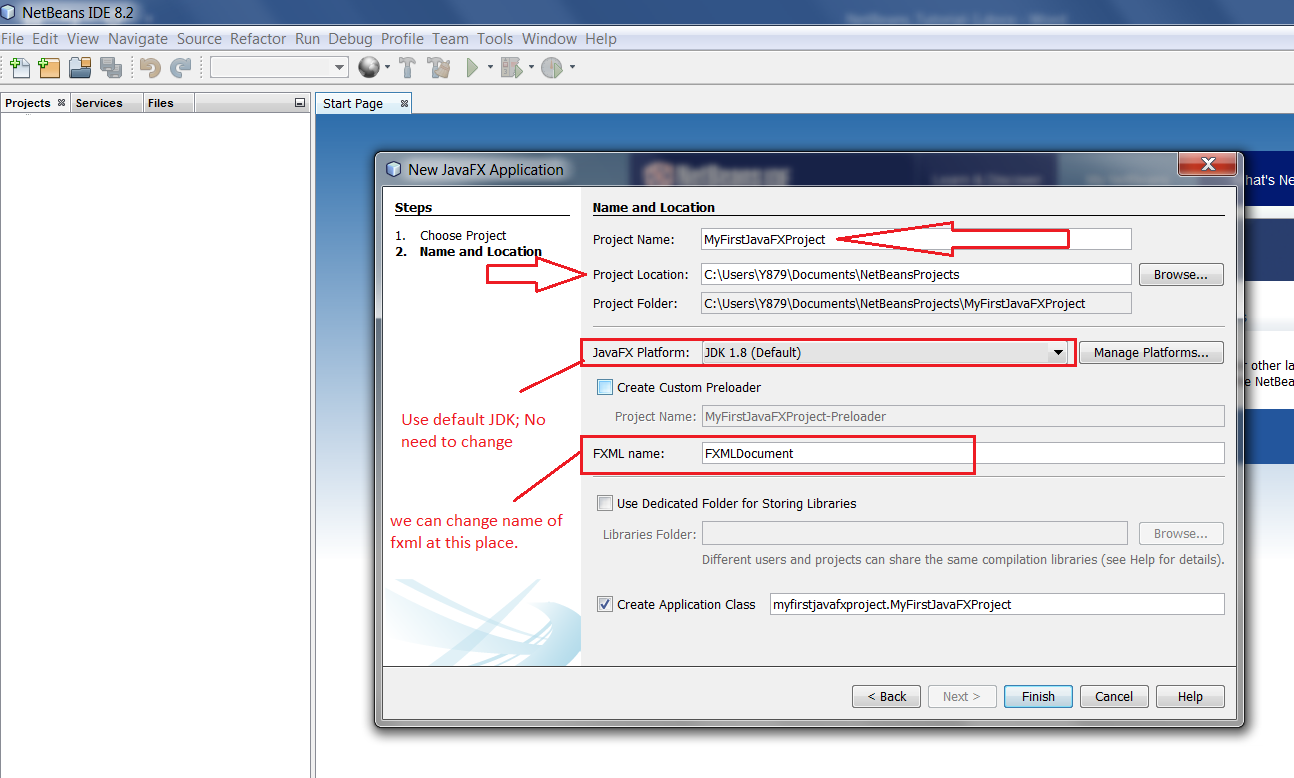
iii) Now project setup window will open like below screenshot. Here you have to type “Project name” and project location and other details. Please see the below image for better understanding.
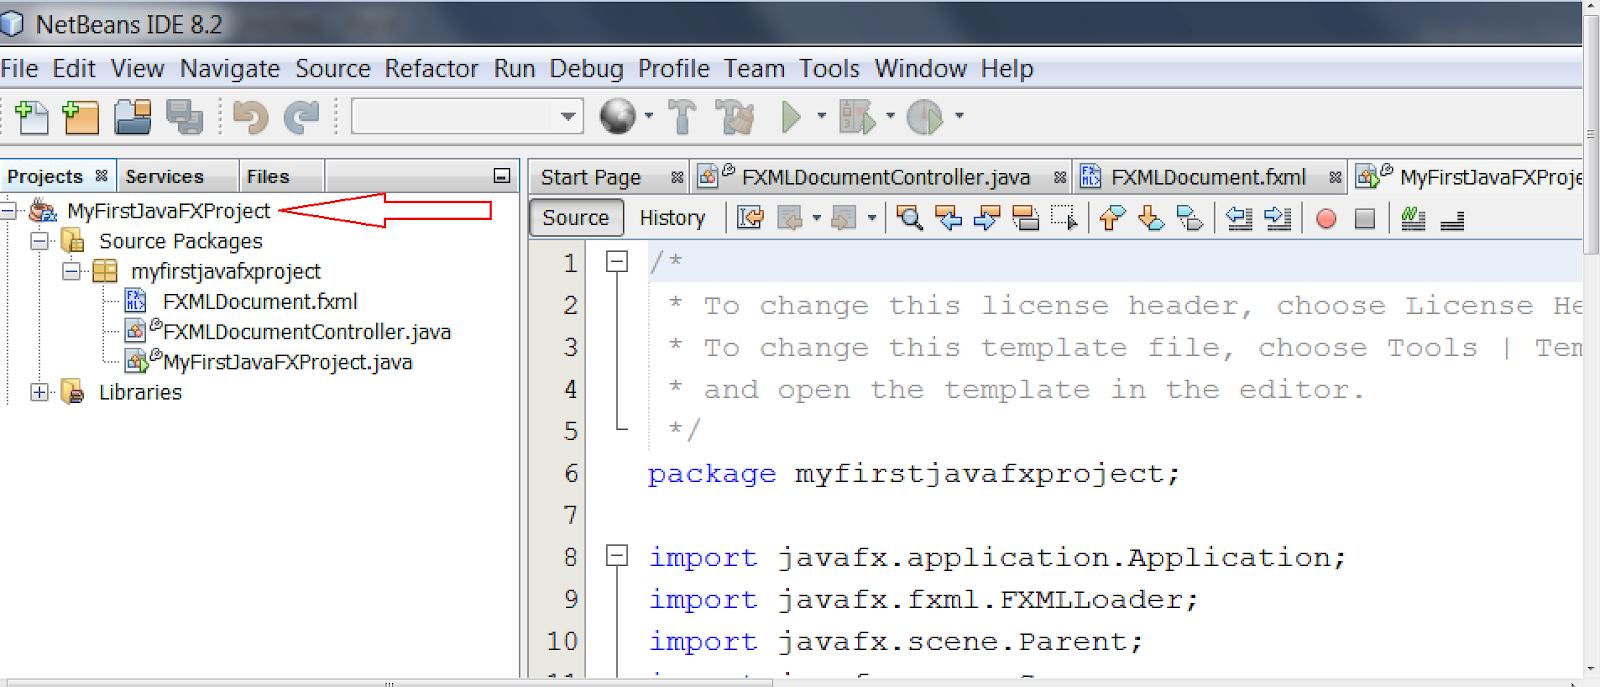
- FXMLDocument.fxml
- FXMLDocumentController.java
- MyFirstJavaFXProject.java
Please refer the below image:
Step 2. Building the Front End in Scene Builder 2.0
Before moving further to create GUI for our project. We should have scene builder installed.
ii) Now go to NetBeans and just double click on FXMLDocument.fxml. This file will open with scene builder in separate window. If this is not opening then do right click >> properties and then copy the path of file as shown in below image.
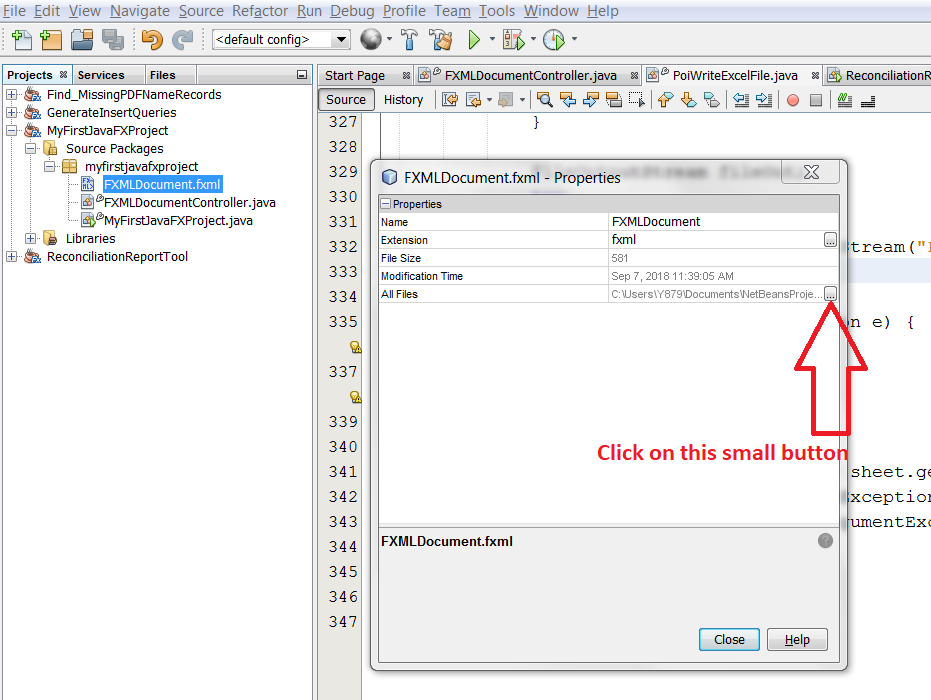
Then click on small button that has three dot(…) and copy the file. Now open Scene Builder and go to File > Open.
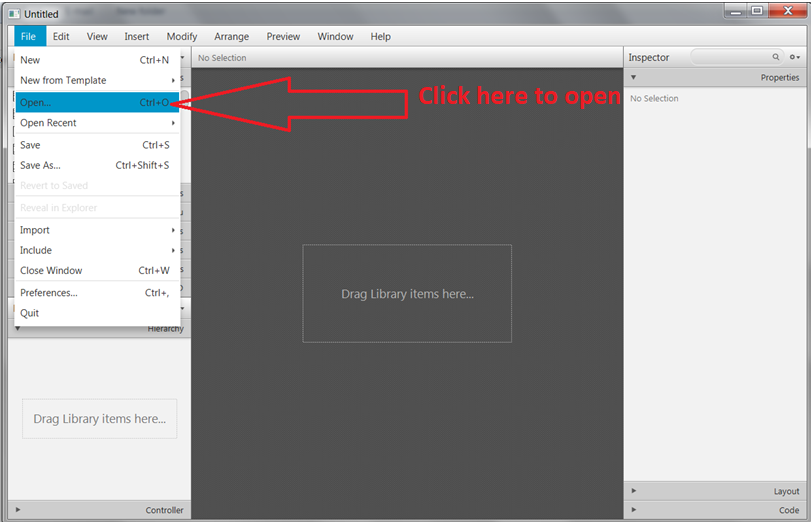
Once you click on Open it will show you see file selection dialog. Then paste the copied path in file Name text box and click open button.

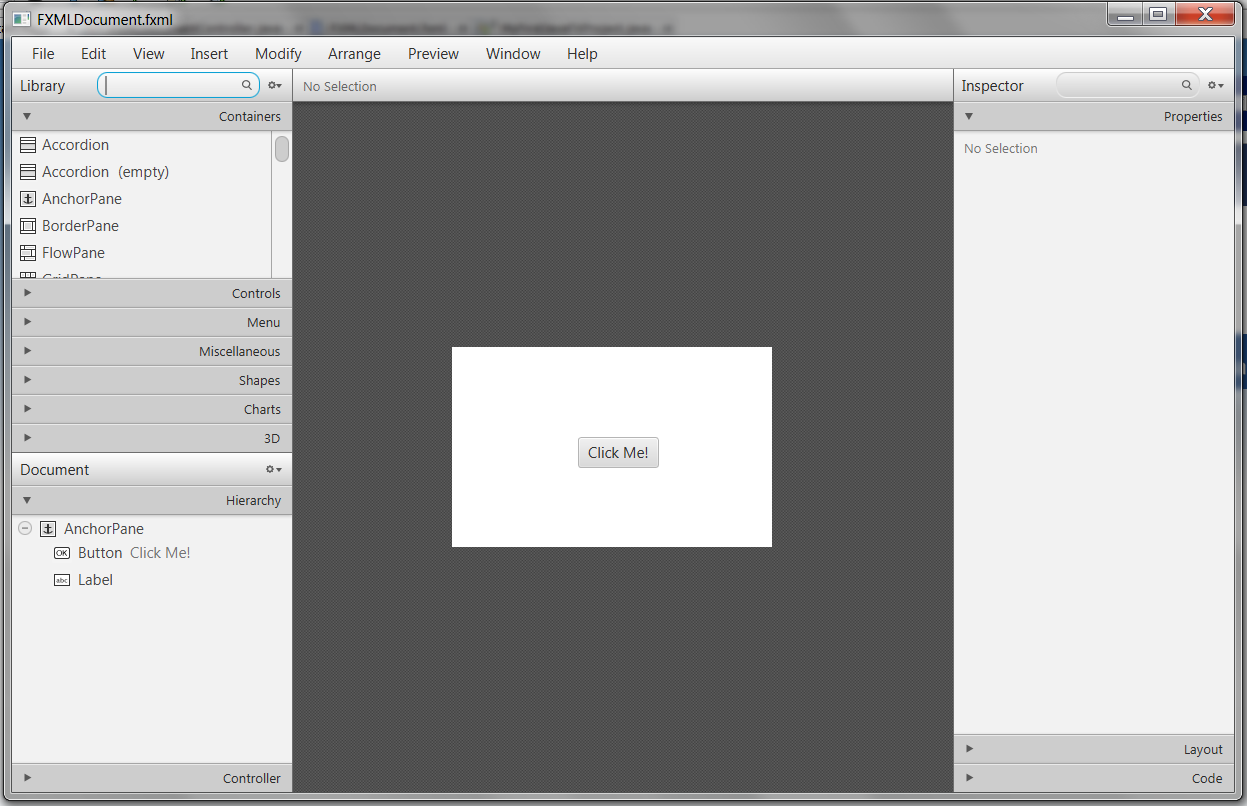
file will open inside scene builder like below image. We have only single
button in it by default. We can add more component as per our requirement. In
this example i will add two text field and then I will concatenate the input
string and print on console on button click event.
Creating GUI in Scene Builder:
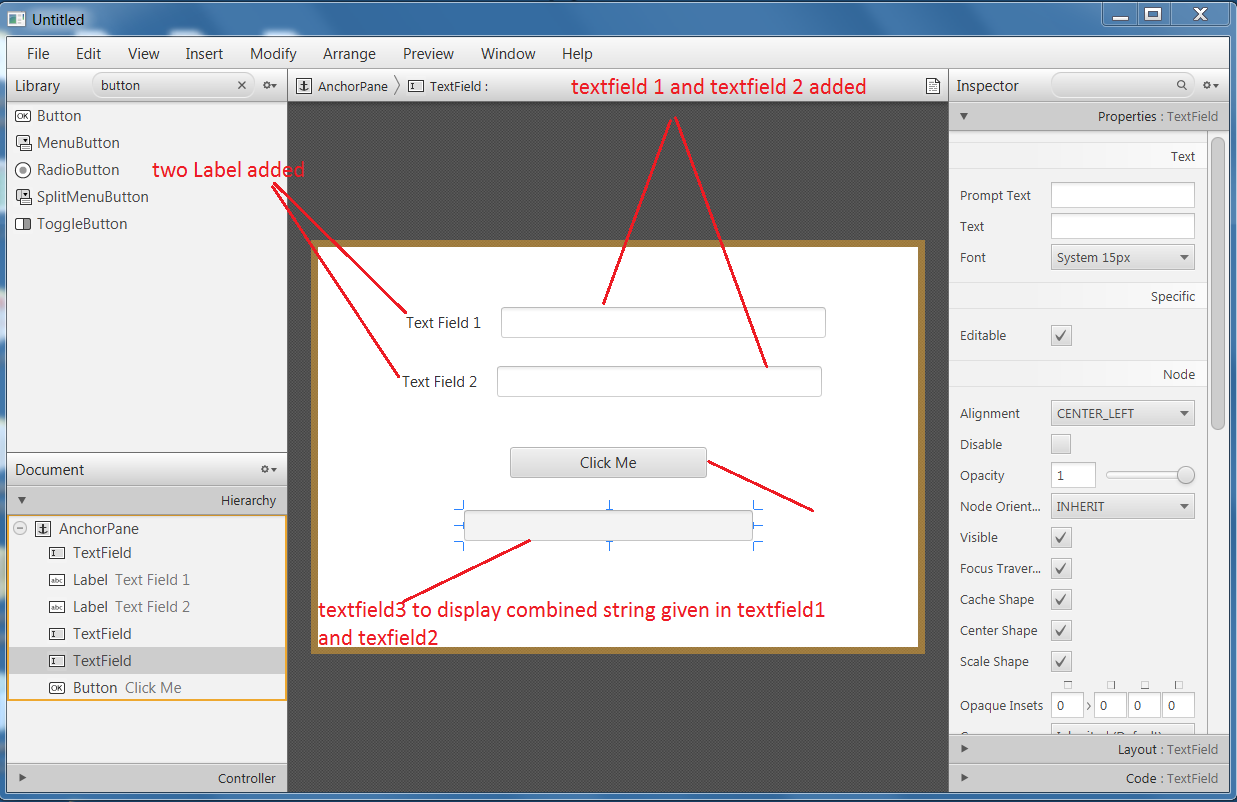
In above step we have opened the FXML in scene builder and now we have to add two text field on stage. Please follow the step shown in below images:
Step 3: Adding Functionality
We are ready with GUI on step 2. Now we have to write code to achieve functionality. Here we will see the string concatenation in this example.
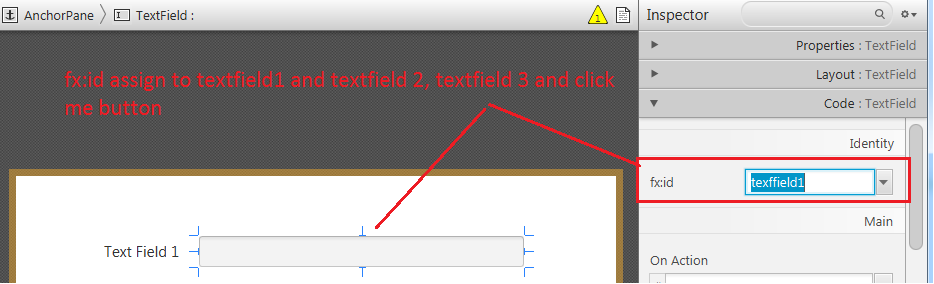
Now open NetBeans IDE and open the FXML file and assign an fx:id to textfield1, textfield2, textfield3 and ‘Click Me’ button. To assign fx:id we can either do via SceneBuilder.

OR simply just open fxml in NetBeans editor window and write code like this.
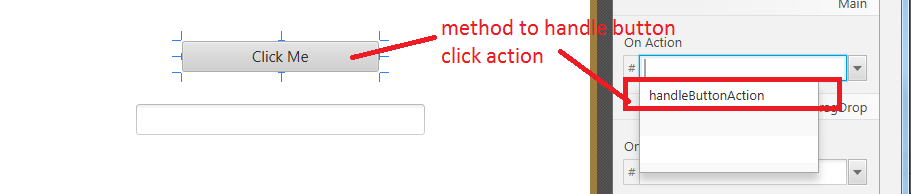
i) Create a method in controller like this :
@FXML
private void handleButtonAction(ActionEvent event)
{
}
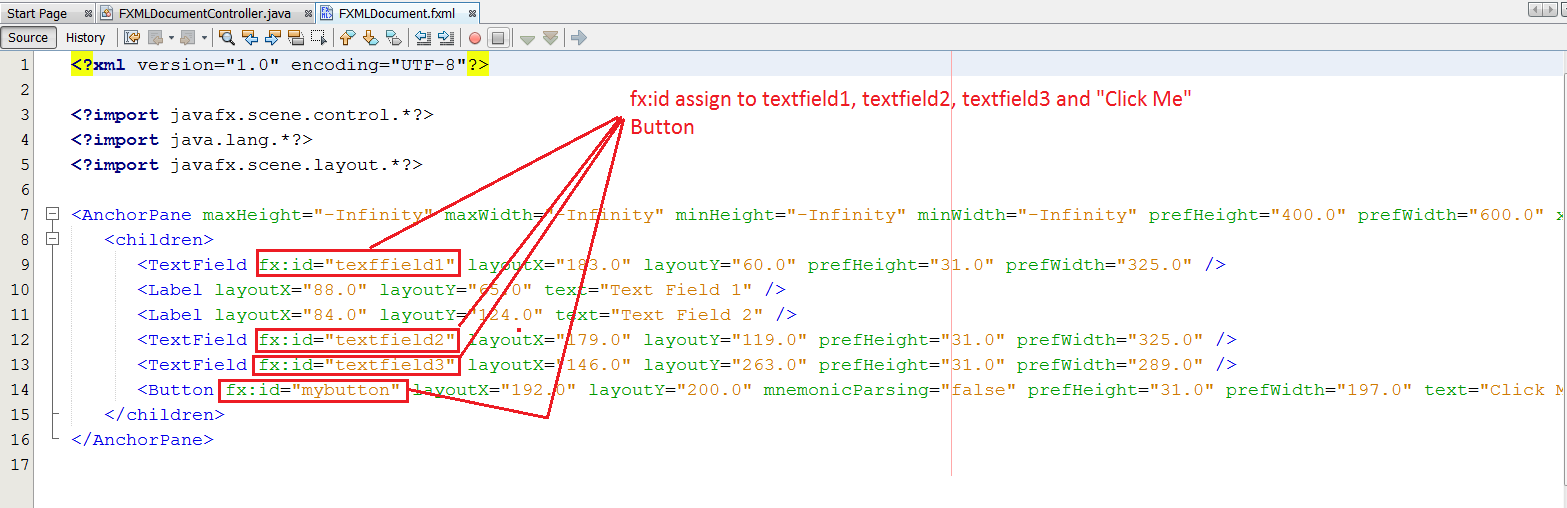
ii) Now do small change in fxml file :

a) Now go to FXMLDocumentController.java file and add following line of code to get the reference of textfield1, textfield2, textfield3 object.
File: FXMLDocumentController.java
****************************
textfield2, textfield3;
handleButtonAction(ActionEvent event) {
textfield2.getText(); // getting value from textfield2
concatinate two string.
string in textfield 3
ResourceBundle rb) {
}
Step 4: Running the Program
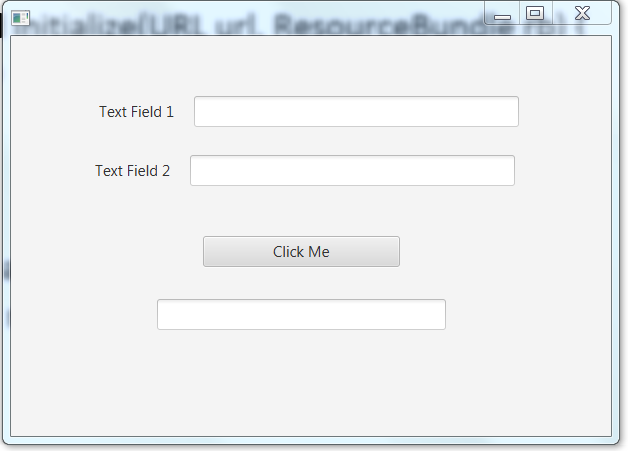
Now enter any string in textfield 1 and textfield 2 and press button “Click Me”. Code written in method “handleButtonAction(ActionEvent event)” will executed and strings of textfield1 and textfield2 gets concatenated into single string and displayed in textfield3.
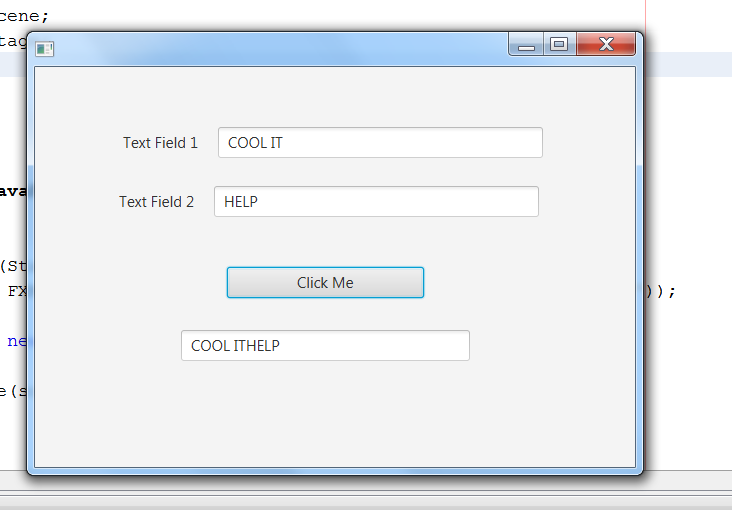
Cheers! You have successfully executed your first JavaFX project in NetBeans IDE.
<<Previous